Central Office Request – New Task
The SeRA Central Office Request allows department administrators to submit requests to their central sponsored research office from within the SeRA system. Benefits of utilizing Central Office Requests include: custom forms and fields for different requests to facilitate department entry, the ability to add attachments relating to the request directly to the request form, being able to easily search and see when a request was submitted, what information was provided in a request, to whom a request was assigned, and the current status of a request.
- New tasks for Investigators can only be added after the Investigator is added to the SeRA SPO record and completes their Investigator certifications. If the Investigator is not yet associated with the project, please select the "Add New Investigator to Project" Central Office Request type.
- For project where sponsors do not require prior approval to add Investigators, departments can use the COR- Add New Investigator to Project guide
When to use the Central Office Request – New Task:
You would like OSR to create a new Oracle Task on an existing Oracle Project and Award
- Log into SeRA
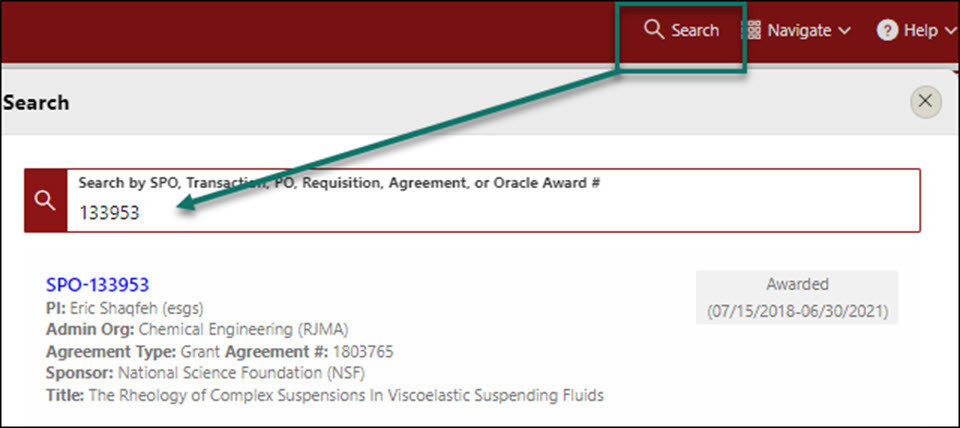
- From the red banner at the top of any page within SeRA click on Search. Enter the relevant SPO #. The search will interactively display matches according to what is being entered. Click on the appropriate blue reference number to drill into the relevant record.
*Note- if you press Enter on your keyboard, the first listed search result will be automatically selected
- From the Project Summary page, click on the Start Transaction menu, and select Central Office Request
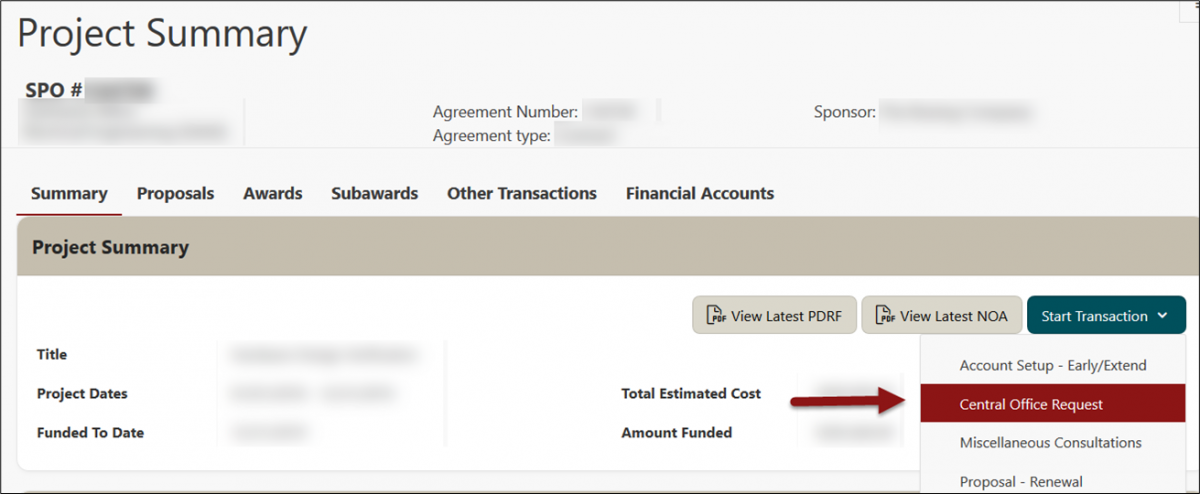
- A Start Transaction dialog box will open. From the Request Type drop down menu select Add New Task and Related Award, click Start

To add additional tasks users can either click + Add Task to create a new blank task and complete all the attributes as in previous steps and/or users can also use the copy task feature to create a new task and pre-populate its attributes with those of the copied task:
Creating New Task using Copy Task Feature -
- To create a new task with pre-populated attributes from an existing task, click on the copy existing task icon

- Add Task configuration window will open
a. Task Type: Defaults to Copy Existing
b. Copy from Task: Select appropriate Task (attributes) you want to copy into the New Task
c. Task Config Code: Select appropriate task type from the pick-list
d. Task Number: Enter a number unique within each project to identify a task. There is no strict naming convention, but typically the series 10, 20, 30, etc. is used. Certain numbers, including 700-799, 900-999, and 4000-4999, are reserved for specific uses.
e. Click Add Task

- The Task window will open with attributes that have been copied over from the existing task source. Edit task attributes as needed and click Save.

- Click on the pencil icon to Edit Budget by Task. Allocate budget and add Expenditure Types as needed and click Save. *Repeat Steps 5-8 to create new Tasks from existing Tasks.


Create a new blank task and complete all attributes-
- To create a new blank Task, click the
link

10. The Add Task Configuration window will open:
a. Task Type: Defaults to New
b. Task Config Code: Select appropriate task type from the pick-list
c. Task Number: Enter a number unique within each project to identify a task. There is no strict naming convention, but typically the series 10, 20, 30, etc. is used. Certain numbers, including 700-799, 900-999, and 4000-4999, are reserved for specific uses.
d. Click Add Task

11. A Task window will open. Enter task attributes and click Save.

12. Click on the pencil icon to Edit Budget by Task. Allocate budget and add Expenditure Types as needed and click Save. *Repeat Steps 9-12 to add additional New Tasks.

13. Use the Left-hand navigation to Add any additional FYI’s and Approver’s and click Next

14. The Review for Completeness check will run and if there are any issues, it will be displayed

15. Once all required information is completed, enter pertinent information in relation to the New Task in the Comments textbox and click Submit for Approval

Need further SeRA assistance? Have questions, feedback, or are experiencing other issues? Please submit a HelpSU ticket to the SeRA Support Team and a SeRA Support Analyst will contact you shortly.